Getting Started
Requirements
Before using Ramsha Framework, make sure you have:
- .NET 10 SDK (Latest version)
- Basic knowledge of ASP.NET Core and backend development
You can verify your .NET installation by running:
dotnet --version
Getting Started with Ramsha (Recommended way)
The easiest way to start using Ramsha is by adding it as a service.
Step 1: Register Ramsha Services
In Program.cs, add Ramsha to the service container:
var builder = WebApplication.CreateBuilder(args);

builder.Services.AddRamsha(ramsha =>
{
    //ramsha.AddModule<SettingsModule>();
});
In this step:
- AddRamsha enables and Configure the Ramsha Engine
- Modules are added using a clear and fluent API like:
AddModule<SettingsModule>() - All required services are registered automatically
Step 2: Initialize Ramsha
After building the application, initialize Ramsha in the ASP.NET Core request pipeline:
var app = builder.Build();

app.UseRamsha();

app.MapGet("/ping", () => Results.Ok("Pang !!"));

app.Run();
Calling UseRamsha:
- Initializes all registered Ramsha Hooks Contributors.
- Integrates required middleware into the ASP.NET Core pipeline
Built-in Modules Overview
Ramsha comes with a set of built-in modules that provide common functionality out of the box. These modules can be plugged into your application simply by adding them as services or declaring as a dependency.
One of the most commonly used built-in modules is the Identity Module.
Identity Module (Quick Introduction)
The Identity Module provides a ready-to-use User/Role management system.
By adding this module, your application immediately gains a complete identity system without additional setup.
Adding Identity Module to Your Application
Step 1: Install Required Packages
To enable the Identity Module, install the following packages.
Ramsha.Identitypackage Which includes all identity-related modules:
dotnet add package Ramsha.Identity
- Ramsha Entity Framework Core Provider Identity uses Entity Framework Core to persist data. Install one Ramsha EF provider based on your database. Example: SQL Server:
dotnet add package Ramsha.EntityFrameworkCore.SqlServer
- EF Core Tools (for Migrations) Required to create and apply database migrations:
dotnet add package Microsoft.EntityFrameworkCore.Tools
Step 2: Register Modules
After installing the required packages, register the Identity and EF Core modules in Program.cs:
using Ramsha;

var builder = WebApplication.CreateBuilder(args);

builder.Service.AddRamsha(ramsha =>
{
    ramsha
    .AddIdentity() // or ramsha.AddModule<IdentityModule>()
    .AddEFSqlServer(); // or ramsha.AddModule<EntityFrameworkCoreSqlServerModule>();
});

builder.Service.AddRamshaDbContext<AppDbContext>();

var app = builder.Build();

app.UseRamsha();

app.Run();
Then, Configure identity inside your DbContext:
public class AppDbContext(DbContextOptions<AppDbContext> options)
: RamshaEFDbContext<AppDbContext>(options)
{
    protected override void OnModelCreating(ModelBuilder modelBuilder)
    {
        base.OnModelCreating(modelBuilder);

        modelBuilder.ConfigureIdentity();
    }
}
Then run and apply migrations to add identity entities.
That's it --- no additional configuration is required to get started.
What You Get Out of the Box
Once the Identity Module is enabled:
- User and role management is fully configured
- Required services are registered automatically
- Database tables are created
- REST APIs are exposed and ready to use
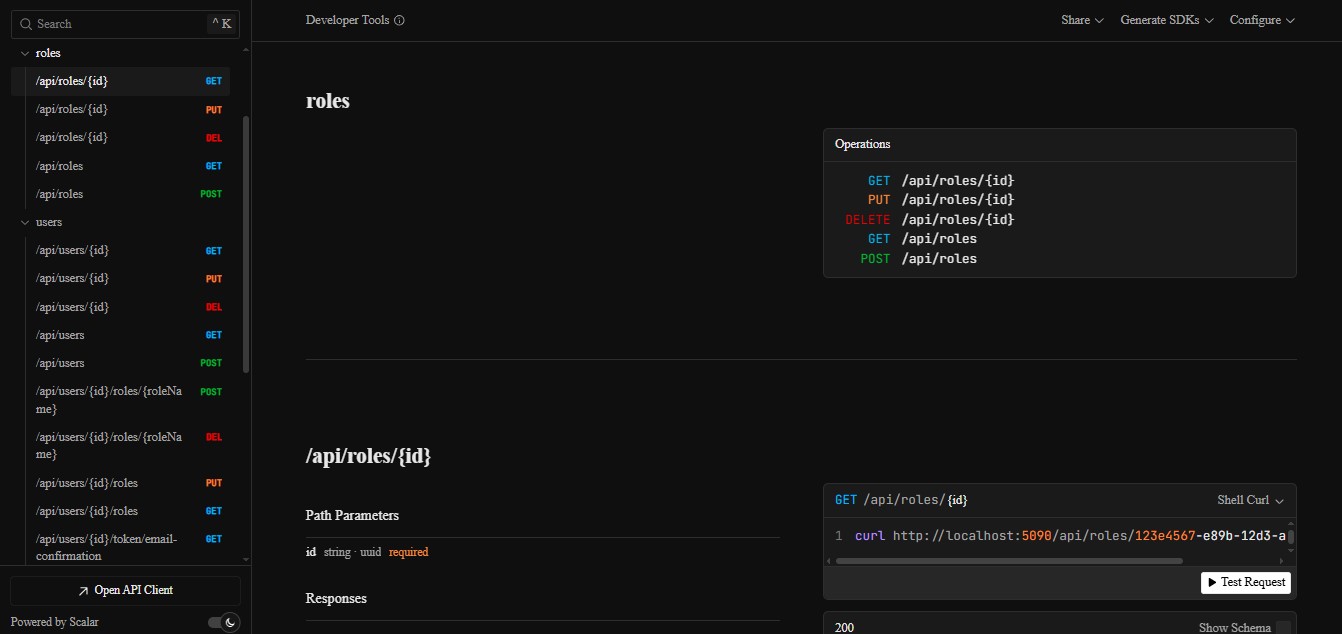
Ready-to-Use Identity APIs
The IdentityApiModule exposes a set of APIs that can be accessed
immediately, so open your browser and type
http://localhost:<port>/scalar, Then you should see Scalar-UI docs
for your Identity endpoints
Learn More About Identity and other Built-in Modules
This section is only a quick overview.
For full installation instructions, configuration options, customization, and advanced usage, see the full documentation for Built-in Modules
Next Steps
Continue with: